In the second part of our PC building best practices series, we
outline a number of issues that can arise when you're configuring and
installing software on a newly built PC.
Building a PC is a protracted, multistep process. First you must pick
a platform and choose a case to best suit your needs. Then you have to
do some research and acquire the individual components. Finally, once
you've chosen all of the components, you can begin the actual assembly.
See the first installment in this two-part series, "PC Building Best Practices: Hardware," for our complete guide.
The build doesn’t end once you've physically assembled the system, however. After putting together all of the components, you must install software on the system before it’ll do a darn thing. Unfortunately, many inexperienced builders simply slap the parts in, burn through an OS installation, and call it a day. Although that may get a PC up and running quickly, several additional steps are necessary to ensure that the computer runs reliably and at peak performance.
System builders should confirm that their components are outfitted with the latest correct firmware or BIOS revisions where applicable, as well as the best drivers. Builders should fully patch and update the operating system, too, and they should complete any tweaks needed to wring additional performance from select components.
Let's get started, shall we?
BIOS and Firmware Updates
Some users will argue that it’s not necessary to update a component’s BIOS/UEFI or firmware unless it is to address a specific problem, while others think that keeping every component up-to-date in an attempt to prevent future headaches is a good idea. I agree with the latter viewpoint, as updated firmware commonly addresses compatibility and performance issues, and occasionally adds new features. Installing
the latest BIOS/UEFI for your motherboard, solid-state and optical
drives, and other devices can help improve stability, compatibility, and
performance.
Installing
the latest BIOS/UEFI for your motherboard, solid-state and optical
drives, and other devices can help improve stability, compatibility, and
performance.When you're assembling a new system, check the component manufacturers' websites for new BIOS/UEFI files or firmware releases for motherboards, solid-state drives, optical drives, add-in-RAID cards, and (to a much lesser extent) graphics cards. Many computer components purchased at retail or online have been sitting on a shelf for weeks, or maybe even months. During that time, many manufacturers continue to refine and improve the firmware on their components. To benefit from those refinements, you must install the newest firmware version.
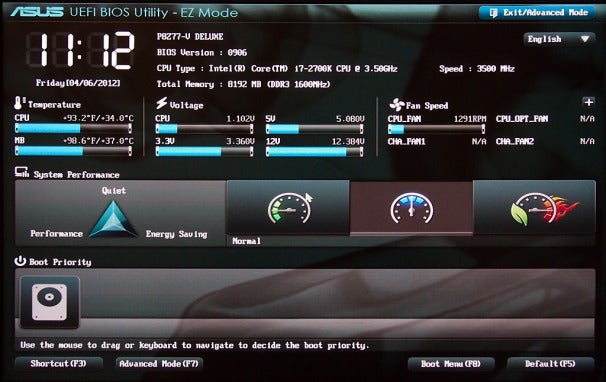
Motherboard manufacturers frequently update their products to address incompatibilities, enhance overclocking capabilities, and add support for new processors and memory, among many other things. Most modern motherboards have built-in tools to flash new and updated BIOS/UEFI files. You can download the files from the motherboard manufacturer’s website, copy them to a USB flash drive, and flash them using the built-in tools. If you have an older motherboard that does not offer an integrated flash utility, however, typically you will have to flash the BIOS using a bootable drive that boots to DOS or from within Windows.
Firmware updates for solid-state drives and optical drives vary from manufacturer to manufacturer. Some provide stand-alone executable files that you need to run in Windows, while others run from bootable drives in DOS mode. For optical drives, firmware updates commonly address compatibility issues with new media, and often improve write performance. In contrast, because solid-state drives are a relatively new technology, SSD firmware updates can be much more substantial. A new SSD firmware can occasionally change the entire performance profile of the drive--usually for the better. Many SSD firmware updates, however, are destructive and will wipe the contents of the drive, so check for an update before installing anything on the drive.
Updates for add-in RAID cards and graphics cards are much less common, relatively speaking, but before you put together a system you should check the manufacturer’s website for updates anyway. Firmware updates for RAID cards can improve performance or solve corruption issues, while updates for graphics cards commonly address motherboard incompatibilities or squash bugs. Such updates may have to run from DOS or within Windows; the process varies from manufacturer to manufacturer.
Operating System Installation
Although you have a myriad of operating system choices, for this article I’m assuming that you’re a Windows user. That said, a proper installation and update procedure is important for any OS. Installing an operating system
doesn’t end when you’ve finished the initial setup and the system has
booted to the desktop for the first time. Unfortunately, this is the
point when many users start to install apps and pollute the system with
junk from around the Web. Instead, immediately after installing Windows,
connect to the Web (which may require installing network-card or Wi-Fi
drivers first) and run Windows Update. And after completing the first
round of updates, keep running Windows Update over and over until no
more patches are available. Many security holes in Windows and its
included applications need patching after a fresh installation, and it’s
best to plug those holes right away to minimize your risk of infection.
Some updates also fix compatibility problems with third-party
applications or add features to the OS.
Installing an operating system
doesn’t end when you’ve finished the initial setup and the system has
booted to the desktop for the first time. Unfortunately, this is the
point when many users start to install apps and pollute the system with
junk from around the Web. Instead, immediately after installing Windows,
connect to the Web (which may require installing network-card or Wi-Fi
drivers first) and run Windows Update. And after completing the first
round of updates, keep running Windows Update over and over until no
more patches are available. Many security holes in Windows and its
included applications need patching after a fresh installation, and it’s
best to plug those holes right away to minimize your risk of infection.
Some updates also fix compatibility problems with third-party
applications or add features to the OS.Device Drivers: Go Get 'Em
 Downloading
and installing the latest drivers for all of your components is usually
the best way to go. The drivers that come from Windows Update or on a
CD or DVD bundled with the component are typically much older than what
you’ll find at the manufacturer site. This is especially true for
graphics cards.
Downloading
and installing the latest drivers for all of your components is usually
the best way to go. The drivers that come from Windows Update or on a
CD or DVD bundled with the component are typically much older than what
you’ll find at the manufacturer site. This is especially true for
graphics cards.After you've completely updated your firmware and fully patched your OS, it's time to install the latest device drivers for all of your components. This is arguably the most crucial step to ensure optimal system performance, compatibility, and stability. However, I recommend that you not install drivers from Windows Update or from the CD/DVD included with your components, if you can avoid it. As I’ve mentioned, Windows Update often serves up older drivers, and the physical media bundled with many devices can be old, too.
I recommend visiting each component manufacturer’s website to download drivers for:
- Motherboards/chipsets
- Graphics cards
- Sound cards/controllers
- Network controllers
- Any other add-in expansion cards
Note, too, that you should install drivers in a certain order. Although there are no hard-and-fast rules, it’s usually a good idea to install your motherboard/chipset drivers first, because typically they’ll affect the system’s USB and storage controllers, PCI Express, and assorted other low-level settings. After installing the chipset drivers, move on to the graphics drivers, followed by all the rest.
Other Tweaks
With all of your driver installations complete, you can move on to the finishing touches. Countless tweaks to Windows can enhance performance or virtually any other aspect of the OS--there are too many to cover in a single article. I can provide a bit of guidance, however. After
your OS is installed and updated, and all of the latest drivers are
installed, you still have to make a few tweaks to wring some additional
performance from the system.
After
your OS is installed and updated, and all of the latest drivers are
installed, you still have to make a few tweaks to wring some additional
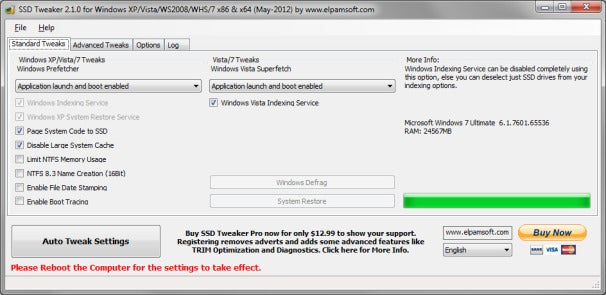
performance from the system.Many specific tweaks for particular components are worth doing. If you have a solid-state drive, for example, I recommend running the downloadable SSD Tweaker utility. SSD Tweaker modifies various OS settings, such as the indexing service and some legacy NTFS settings, to increase the SSD’s overall performance and long-term reliability. For graphics cards, great third-party utilities such as MSI’s Afterburner or EVGA’s Precision make it easy to tweak fan speeds or to overclock your GPU.
Tweaking Windows for optimal performance (and minimal annoyance) is advisable as well. Manually specifying a static pagefile is a good tweak to ensure that your PC never runs out of virtual memory, and to minimize any thrashing of a hard drive or unnecessary writes on an SSD. Don’t disable your pagefile, however; although it’s not always required, some applications still need it to function properly. I also advise replacing some of Windows’ included apps with better third-party tools. For instance, you can replace Windows’ built-in defragmentation tool with the superior Defraggler and augment the Disk Cleanup tool with CCleaner, both from Piriform.
Once you’ve completed all of your installations and tweaks, run Disk Cleanup (and CCleaner) to sweep out any leftover junk and temp files, and to reclaim as much storage space as possible. Don’t be surprised if you gain gigabytes of space, even on a clean system. And if your PC has a hard drive, once it’s clean, defragment it (but never defragment a solid-state drive).
Although I couldn’t possibly cover all of the tweaks and nuances of every possible hardware and software combination in this article, I hope I’ve given you enough high-level guidance to set up and optimize your new rig properly. Just remember, your build isn’t finished simply because you’ve put together a few parts and run the Windows installer. Update the firmware, install the latest drivers, patch and tweak the OS, and clean out the junk before considering your build complete.
Ref:
Pcworld
No comments:
Post a Comment